
How to Fix a Water-Damaged Ceiling: A Step-by-Step Guide
Jun 01, 2026A water damaged ceiling is more than an eyesore it's a warning sign. Left untreated, it can lead to structural damage, mold growth, and costly repairs. The good news? With the right approach, you can fix it yourself and protect your home for good.
Understanding Water Damage on Ceilings
Water damage on ceilings can come from many sources a leaking roof, a burst pipe above, an overflowing bathroom, or even condensation buildup. Whatever the cause, the result is the same: stained, weakened, or sagging ceiling material that needs attention fast.
Common signs of a water damaged ceiling include:
- Brown or yellow water stains
- Sagging or bubbling drywall
- Peeling or flaking paint
- Visible mold or musty odor
- Active dripping or wet spots
- Soft or crumbling plaster
Minor ceiling water damage (small stains, surface discoloration) can often be a DIY fix. Major damage like widespread sagging, mold colonies, or structural compromise may require a professional.
Tools & Materials You'll Need
Before you begin, gather everything you need. Being prepared saves time and ensures a quality repair.
- Drywall knife / utility knife
- Drywall saw
- Joint compound (mud)
- Stain-blocking primer
- Ceiling paint
- Safety gloves & goggles
- Dust/mold respirator mask
- Fan or dehumidifier
- Drywall sheets & screws
- Drywall tape & sandpaper
The Step-by-Step Repair Process
Step 1: Find & Fix the Source of the Leak
This is the most critical step. Repairing your ceiling before stopping the leak is a waste of time and money. Trace the water stain back to its origin — check the roof, plumbing pipes, or the bathroom above. If you can't identify the source yourself, call a plumber or roofer before touching the ceiling.
Step 2: Dry Out the Damaged Area Completely
Once the leak is fixed, allow the ceiling to dry fully. Use fans, dehumidifiers, or open windows to speed up the process. Drywall must be completely dry before repairs — typically 24 to 72 hours depending on the extent of saturation. Skipping this step leads to mold growth beneath your repair.
WARNING: Never attempt ceiling repairs on wet or damp drywall. Trapped moisture causes mold to grow behind your finished surface within days.
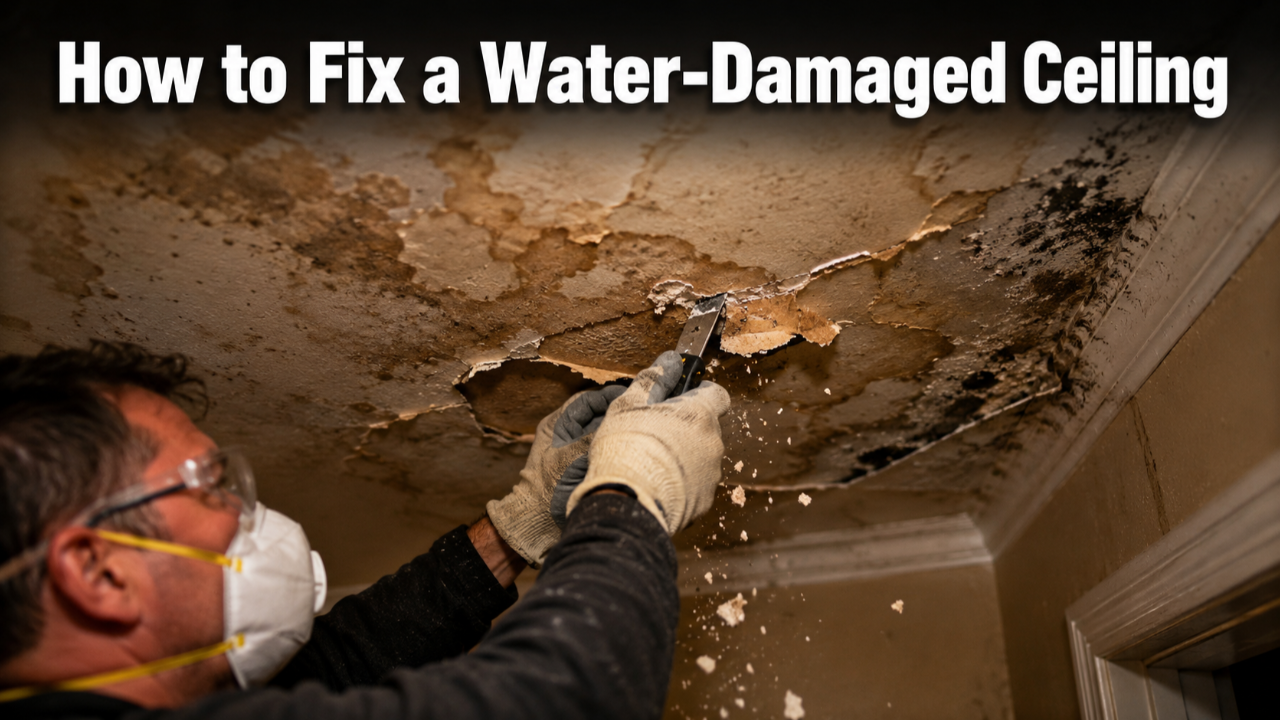
Step 3: Remove the Damaged Ceiling Material
Cut away all soft, crumbling, or discolored drywall using a utility knife or drywall saw. Remove more than you think you need — damaged material that looks fine on the surface may be waterlogged inside. Inspect the space above for additional moisture, insulation damage, or mold growth.
Step 4: Treat for Mold (If Present)
If you spot black, green, or gray spots, treat them immediately. Apply a diluted bleach solution (1 cup bleach to 1 gallon water) or a commercial mold-killing spray. Allow it to dry completely. For large mold infestations covering more than 10 square feet, contact a certified mold remediation professional — this is a health risk you shouldn't handle alone.
PRO TIP: Always wear an N95 respirator mask and gloves when dealing with mold. Mold spores become airborne during removal and can cause serious respiratory issues.
Step 5: Repair or Replace the Ceiling Section
For small holes (under 6 inches), use a drywall patch kit or self-adhesive mesh patch. For larger sections, cut a clean rectangle, install wooden backing strips between joists for support, and screw in a new piece of drywall. Make sure the patch sits flush with the surrounding ceiling surface.
Step 6: Apply Joint Compound & Sand Smooth
Apply drywall joint compound (mud) over the patch and tape seams. Feather the edges outward for a seamless look. Allow each coat to dry fully (4–6 hours), then sand smooth with 120-grit sandpaper. Apply at least 2–3 coats for a professional, invisible finish. Wipe away dust before moving to the next step.
Step 7: Prime & Paint the Ceiling
This step is non-negotiable: use a stain-blocking primer (like Zinsser BIN or Kilz) before painting. Regular primer will not stop water stains from bleeding through. Once the primer is fully dry, apply one or two coats of quality ceiling paint using a roller. Feather outward to blend with the surrounding ceiling and avoid visible patch lines.
How to Prevent Water Ceiling Damage in the Future
The best repair is the one you never have to do. Protect your ceiling with these simple prevention habits:
- Inspect your roof every 6 months
- Fix plumbing drips immediately
- Insulate pipes in cold weather
- Use bathroom exhaust fans
- Keep gutters clean and clear
- Apply moisture barriers in attics
Conclusion
A water-damaged ceiling might seem overwhelming at first, but with the right tools and a step-by-step approach, it is completely manageable as a DIY project. The key is to act fast — fix the leak source, dry the area thoroughly, remove the damaged material, treat for mold, and finish with a stain-blocking primer and quality ceiling paint. Skipping any of these steps can lead to bigger problems down the road, so take your time and do it right the first time.
Taking care of your ceiling today protects your home, your health, and your wallet tomorrow. Mold, structural damage, and recurring leaks are all preventable when you stay on top of repairs and maintenance. For more expert home repair tips and air quality guides, keep visiting IAQAnswers — your trusted source for a safer and healthier home.
Schedule Your Indoor Air Quality Check Today
Worried about the air inside your home? Our professional indoor air quality inspections help identify hidden pollutants, allergens, and airflow issues so you can breathe cleaner, healthier air with confidence.
